Chapter 02 : Cookery
Introduction
Cookery is the act of preparing and cooking food. It involves selection, preparation, and processing of food using different methods. Knowledge and skills in food preparation are important to school age children to develop competences in preparing healthy food. Much attention and hygiene is needed when preparing food to avoid health problems. In this chapter, you will learn hygienic ways in food preparation, food groups, cooking methods using various recipes, and beverage preparation.
Personal hygiene in food preparation
Unhygienic handling of food can cause diseases such as diarrhoea and dysentery. Meal preparation should be given adequate attention to prevent someone from getting sick as a result of eating contaminated food. Personal hygiene should be observed to prevent food contamination. The following are useful guidelines for personal hygiene:
- Nails should be kept short and hands should be washed with clean water and soap before and after food preparation.
- Wear clean clothes such as an apron and cover your hair with a hat or head scarf.
- Cover cuts or sores or wounds with clean bandages or wear hand gloves while preparing and cooking food.
- Cover the mouth and nose with a handkerchief when coughing or sneezing.
Kitchen Hygiene
A kitchen is an important area for food preparation. It should be kept clean to prevent health problems. A dirty kitchen environment may attract insects like flies and cockroaches as well as animals like rodents.
These organism are dangerous to health. Therefore all working surfaces, cooking and serving equipment as well as storage areas must be kept clean.
The following guidelines are useful for kitchen hygiene:
- The kitchen should be well ventilated so that it is free from bad smells and pests.
- Clean the stove or cooker and the walls surrounding the cooker immediately after cooking.
- Wash all used kitchen utensils thoroughly using clean water and soap.
- Dry the utensils either by using a draining board, dish rack, or a clean dry cloth and keep them in a safe place.
- Sweep and mop the kitchen floor regularly depending on the type of floor.
- Wasted food such as banana and potato peels should be kept into dustbins.
- Empty the dustbins daily and cover them well to prevent pests such as flies, cockroaches, ants and rodents, which can spread diseases.
- Wash all kitchen towels regularly, dry them in the sun, and iron them before using them.
- Store leftovers in clean containers and place them in the refrigerator, in the netted cabinet, or in a clean area which allows air circulation.
- Keep the food store clean and dry all the time. The stored food should be covered.
Note: Kitchen cleanliness should be done daily and weekly to maintain hygiene and good health for individuals.
Daily cleaning of the kitchen: The kitchen should be cleaned daily to remove dirt after food preparation.
The following guidelines are useful for the daily cleaning of the kitchen:
- Open the windows in the morning to allow in enough fresh air.
- Sweep the floor according to its type.
- Wipe over the refrigerator and the cooking stove.
- Clean the kitchen table or surface according to its type.
- Dust any other equipment such as chairs in the kitchen.
- Wipe the floor or clean it according to its type.
- Tidy up the kitchen, for example, by putting things in their right places and arranging utensils.
Weekly cleaning of the kitchen:The kitchen should be thoroughly cleaned to ensure the removal of dirt and to prevent growth and multiplication of germs and pests. These are dangerous to health.
The following are useful guidelines for the weekly cleaning of the kitchen:
- Open the windows in the morning and carry out the daily routine.
- Remove cobwebs.
- Sweep down the walls and clean the cooker according to its type using an abrasive and cleaning pad.
- Remove food containers from the cupboard shelves and keep them on the kitchen table.
- Dust the shelves and scrub them with water containing disinfectant.
- Wipe out the utensils drawers thoroughly. Leave the shelves and drawers to dry. Then re-arrange them if necessary.
- Clean the racks and the dustbin thoroughly with soapy water and rinse them well. Clean the working surface according to the kind of material used.
- Clean the sink thoroughly.
- Clean the wall around the sink and cookers.
- Clean the windows and window frames.
- Clean the kitchen floor according to its type with warm, soapy water and some disinfectant. Rinse thoroughly and dry.
- Wash the kitchen cloths using clean water and soap. You may boil them to loosen the dirt.
- Rinse and dry them in the sun.
- Re-arrange the food containers on the shelves and tidy up the kitchen.
Food groups
When preparing a meal, it is important to select food from different groups. Different food types are found in our community. These include plant and animal foods. Such foods can be grouped as followers:
- Body building foods
- Energy yielding foods
- Protective foods
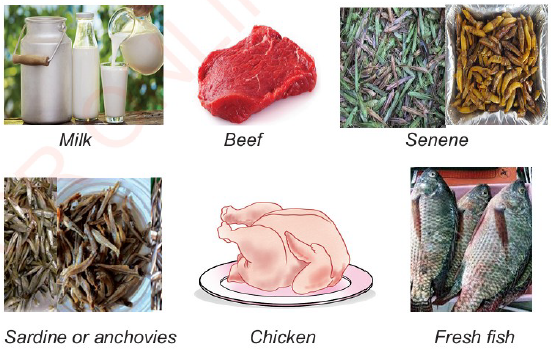
Body-building foods: Body-building foods are protein foods from animal, insect and plant sources. The main function of these foods is to grow and repair our bodies. Examples of foods that are protein in nature are milk, meat, fish, beans, cowpeas, pigeon peas, and green grams. Others are winged termites such as "senene" and flying termites ("kumbikumbi")
 |
 |
| Fig. 1 Example of body building foods |
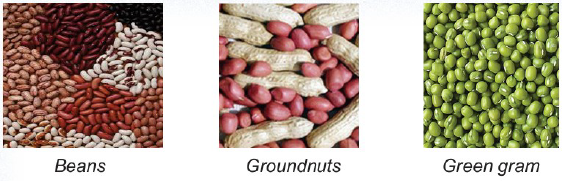
Energy yielding foods: These are foods we eat in order to get energy and heat to enable our bodies to do different activities. Energy-yielding foods involve carbohydrates, oils and fat. Examples of carbohydrate rich foods are rice, maize, potatoes, cassava, yams and green bananas. Examples of oil and fatty foods are groundnuts, sesame, pumpkin seeds and palm seeds as well as animal fat and ghee.
 |
| Fig. 2 Example of Energy-Yielding Food |
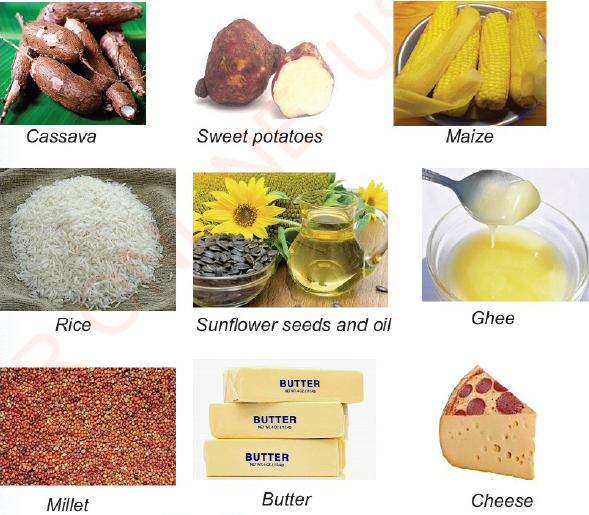
Protective foods: These are foods that contain adequate amounts of vitamins and minerals. They protect our bodies against nutrient deficiency diseases such as pellagra, beriberi, and scurvy. They also help our bodies to fight against diseases. Examples of these foods are green leafy or yellow vegetables such as amaranth, sweet potato leaves and carrots. Other protective foods are different types of fruits such as oranges, mangoes, pawpaw, tamarind, jackfruits, and baobab.
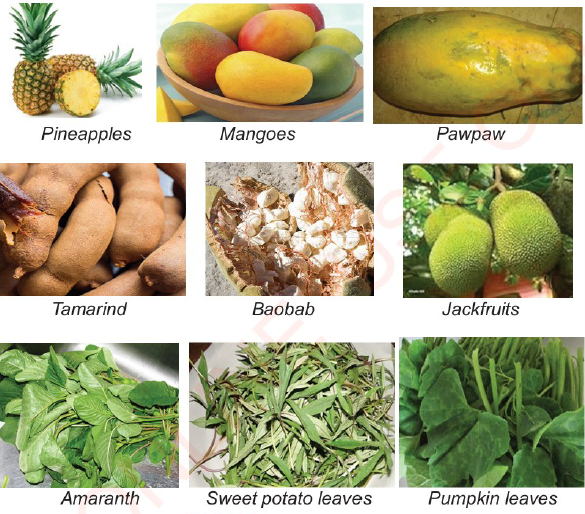 |
| Fig.3 Protective foods |
Cooking methods
Many types of food are cooked before eating. Examples are maize, beans and rice. Foods such as carrots, cassava and coconuts are sometimes eaten raw. Food is cooked for the following reasons:
- To kill germs and bacteria which may cause diseases.
- To make it soft and therefore easily digestible.
- Food becomes tasty as flavours of different types are added to it during preparation.
- To make meal colourful and attractive, a cook has a chance of mixing a variety of foods.
Foods are cooked by using different methods. These methods include
boiling, stewing, steaming, simmering, frying, roasting, baking and grilling.
Boiling: This is a moist method of cooking in which food is cooked in just enough boiling water to cover it. The food should be covered with lid to maintain temperature and prevent loss of nutrients. There are two ways of cooking by boiling. The first way involves adding the food in boiling water and the second one involves putting the food together with cold water and placed them on the stove for boiling. Examples of foods that can be boiled are rice, ugali, green bananas, cassava, potatoes, beans, green gram, pigeon peas, and yams.
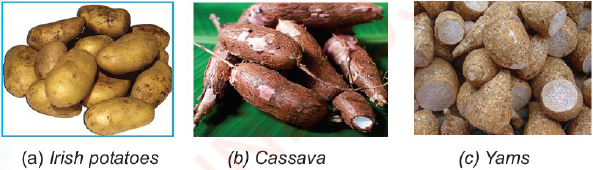 |
| Figure 4: Foods that can be cooked by boiling |
Important consideration in boiling food
- Ensure the food is boiling all the time during cooking.
- Use enough water when cooking depending on the food being boiled.
- Cover the pan with a fitting lid to increase boiling temperature and to prevent nutrient loss through evaporation.
- Boiling at a very high temperature can harden the protein found in foods such as fish and meat. Therefore, one should use moderate temperature while cooking.
Steps to be followed in cooking by boiling
- Prepare utensils to be used for cooking.
- Prepare all ingredients required based on the food to be cooked.
- Put the food in a pan and add enough water.
- Put the pan on the cooking stove.
- Boil until the food is cooked.
- Remove the pan from the stove and serve the food.
Boiling cassava
Utensils
Sauce pan with a lid, knife, basin, cooking stove, plate or bowl and chopping board
Ingredients
- Cassava
- Salt
- Oil or fat, if preferred
Steps to be followed in boiling cassava
- Wash the cassava with clean water and peel it.
- Cut the cassava into pieces and wash them with clean water.
- Put the pieces into a sauce pan and add enough water to cover them.
- Add salt, oil and other preferred ingredients.
- Cover the cooking pan with a fitted lid. Banana or yam leaves may be used to cover the pot or pan firmly.
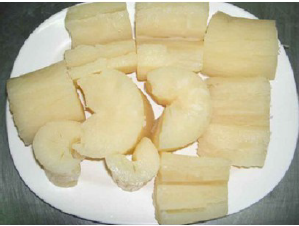
- Boil the cassava for 15-30 minutes and lower the temperature to allow the cassava to continue boiling until well cooked.
- Remove it from the stove and serve the food as shown in Figure 5.
|
Figure 5: Boiled cassava |
Activity 2
Prepare, cook, and serve any food of your choice by using the boiling method.
Frying: Frying is cooking food in hot oil. Frying can be divided into dry, shallow and deep fat frying. Dry frying is suitable for foods which are oily and can be cooked in their own oil. Examples are fatty meat, oily fish, fatty pork, senene, and sausages. Shallow fat frying is used for foods which need very little oil such as pan cakes, omelette, spanish egg and chapattis. Deep frying is when food is cooked by being completely immersed in hot fat. Examples of suitable foods for this method are African doughnuts, crisps, chips, kababs, samosa, bagia and egg chops.
Shallow frying: This method of cooking food uses little oil. It includes shallow frying and stir frying. Shallow frying involves cooking with little oil in a frying pan where one side of the food is fried first to attain a better appearance. Then the food is turned on the other side so that both sides are fried and coloured. Examples of foods that can be cooked using this method are eggs and African doughnuts. Stir frying is fast frying of food using little oil. Foods that can be cooked using this method are green leafy vegetables, liver, kidney, fish, cabbage, and other vegetables.
Advantages of shallow frying
- It does not loose fat soluble nutrients.
- It is a quick method of cooking.
- It retains food colour, making it attractive and delicious.
Disadvantages of shallow frying
- Partially fried food is not easily digested.
- It needs close supervision when cooking.
- If not thoroughly cooked, the food can retain pathogenic microorganisms that may cause a stomach upset.
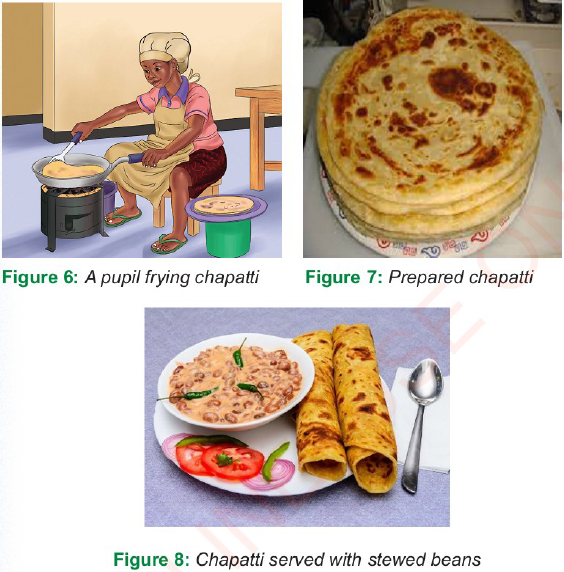
Frying chapatti
Chapatti is a type of food which can be eaten as a snack or main meal.
Usually, it is made of wheat flour. This food provides heat and energy to the body.
Utensils
Frying pan, tea spoon, table spoon, flour sieve, bowl or plate, grater, rolling pin and board
Ingredients for cooking 7 chapattis
- ½ kg wheat flour
- ½ cup cooking oil
- ½ tea spoon salt
Steps to be followed in frying chapatti
- Collect utensils and ingredients.
- Sieve the flour and put it in the bowl.
- Add salt into the flour and mix them.
- Add 3 table spoonfuls of oil or fat into the flour and mix them using fingers until the mixture is smooth.
- Add warm water to the mixture and mix with fingers to make smooth dough. Mix until the dough does not stick on the fingers and the mixing bowl.
- Cut the dough into equal balls.
- Roll each ball into a round shape on a lightly floured surface.
- Spread with little melted fat or oil to make the mixture soft and roll this into a ball again.
- Cover the balls by using a clean, damp cloth and leave them for a few minutes.
- Roll each ball again to about 2 cm thickness.
- Start to cook the chapattis one at a time.
- Fry one side of the chapatti until brown.
- When the chapatti changes colour on one side, turn it to other side and spread little oil on the brown side of the chapatti.
- Turn the chapatti on the other side and spread little oil until it is brownish in colour on both sides.
- Keep the cooked chapatti in a covered dry container
- Chapatti are now ready to be served
 |
Activity 3
Prepare, cook, and serve food using shallow frying.
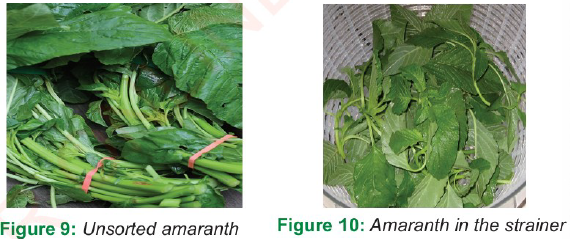
Frying amaranth
Amaranth is among the green vegetables which provide the body with vitamins and minerals for protection. Amaranth is palatable and easy to cook as it requires a short time. It can be consumed by people of all age groups, including children aged above six months.
Utensils
Cooking pan, wooden spoon, winnower, basin, knife, vegetable strainer or colander, chopping board, plate or bowl
Ingredients
- 2 bunches of amaranth
- 1 onion
- 1 table spoon of cooking oil or fat Salt
Steps to be followed in frying amaranth
(i) Collect utensils and ingredients.
(ii) Sort out amaranth on a winnower or platter to remove all dirt and unwanted parts.
(iii) Wash the amaranth using running water before cutting into pieces to CC prevent nutrient loss.
(iv) Put the amaranth in the vegetable strainer or a clean utensil to drain as shown in Figure 10.
 |
(v) Chop onions and place them on a plate or in a bowl.
(vi) Cut the amaranth in medium-size pieces by using a sharp knife ready for cooking as shown in Figure 11.
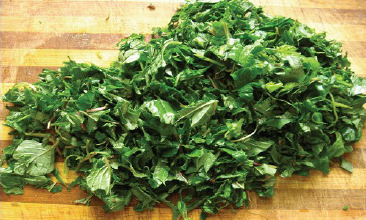 Figure 11: Chopped amaranth |
(vii) Preheat the required amount of cooking oil or fat.
(viii) Add chopped onions and fry them until they turn brownish.
(ix) Add the amaranth and cover it with a lid to prevent nutrient loss.
(x) After 3 minutes, turn over the amaranth and cover the mixture for 3 to 5 minutes. Then remove it from the stove and serve it while hot.
Note: Fried amaranth can be served with ugali as shown in Figure l3.
Avoid using sodium bicarbonate in cooking leafy vegetables because it destroys vitamins and minerals.
 |
Activity 4
Prepare, cook, and serve any vegetable of your choice using the frying method.
Deep frying: In this method, much oil is used and the food to be cooked is completely covered with hot oil. It is important to select cooking oil depending on the type of food to be cooked. The temperature of the cooking oil depends on the type of food to be cooked.
Advantages of the deep-frying cooking method
- It saves time because it is quick especially when a lot of food is to be prepared at once.
- Deep fried foods can be stored for several days without going bad because much water is being reduced from the food.
- The method makes the food delicious and tasty.
Disadvantages of the deep-frying cooking method
- Deep fried foods take a longer time to be digested.
- If the oil is not preheated well, the food can absorb oil that can affect its taste and our health.
Points to consider when cooking by deep frying
- Ensure the oil is heated well to prevent the food from absorbing oil or getting burnt before it is well cooked.
- Make sure the oil used is clean, safe, and pure; it does not contain water. Avoid using dirty oil as this can cause a bad smell on food and health problems.
- Ensure the food to be fried does not contain water in order to prevent explosions.
- Utensils used for frying must be clean and dry.
Steps to be followed in deep hying
- Choose appropriate frying oil depending on your preference and the type of food.
- Add cooking oil to the deep frying pan, about two thirds of the pan. (Hi) Heat the oil to the desired temperature. Ensure that any foam on the surface of the oil is cleared.
- Check whether the oil has attained the required temperature by adding a small piece of food. If the food suddenly floats, it means the oil is heated enough and ready for frying.
- Immerse the food into the heated oil slowly in order to avoid splashes or splatter that may cause hams such as bums or fire explosions.
- Deep fry until the food attains a brown colour on both sides.
- Remove the food from the heated oil using a long perforated spoon and put it on a plate with cooking absorbent paper towel or a bowl with small holes to allow the food to cool and drain excess oil.
- Serve the food as desired.
Grilling: This method of cooking uses dry heat which originates directly from charcoal or firewood. You can also grill food in an electric or gas stove which has a grilling chamber. Examples of foods which can be cooked by grilling are meat, green bananas, fish, cassava, potatoes and green maize.
Advantages of grilling
- It softens the food and makes it tender.
- It is easy to be digested and absorbed in the body.
- It makes the food tasty and palatable.
- Grilled food is healthy for the body as less fat is used.
- It preserves nutrients.
Disadvantages of grilling
- It needs close supervision otherwise the food will get burnt.
- Sometimes the food may not cook evenly.
- The smoke can be harmful to human health.
Rules to follow in grilling
- Apply little oil on the food especially meat to prevent it from too much drying during grilling.
- When grilling using charcoal, make sure the charcoal does not produce smoke so that the food does not smell smoky.
- Use average temperature when grilling to allow the food to be evenly cooked. The duration used for grilling depends on type of food, texture, and thickness of the food to be cooked.
- When grilling, turn over the food more frequently to avoid it getting burnt.
Grilling meat
Utensils
Stove, skewer or long sticks for grilling, plate or bowl, wire mesh
Ingredients
- ½ kg of meat
- 1 tea spoon of salt
- 1 pepper
- 1 ginger
- 1 garlic
- 1 lemon
- 1 table spoon of oil
Steps to be followed in grilling meat
- Prepare all utensils and required ingredients.
- Chop the meat in small pieces.
- Grind pepper, garlic and ginger.
- Add salt, a little amount of oil and lemon juice into ground spices.
- Mix the ingredients with the chopped meat and leave them for 15 minutes.
- Skew the pieces of meat.
- Prepare the grilling stove.
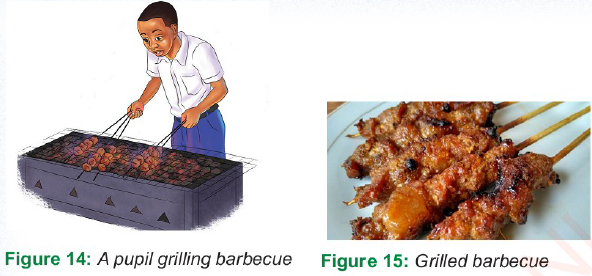
- When the fire is ready, start to grill the meat while turning over all sides until the meat is well cooked as shown in Figure 14.
- Remove them from the stove and prepare them for consumption as shown in Figure 15.
 |
Activity 5
Prepare, cook, and serve any grilled food of your choice.
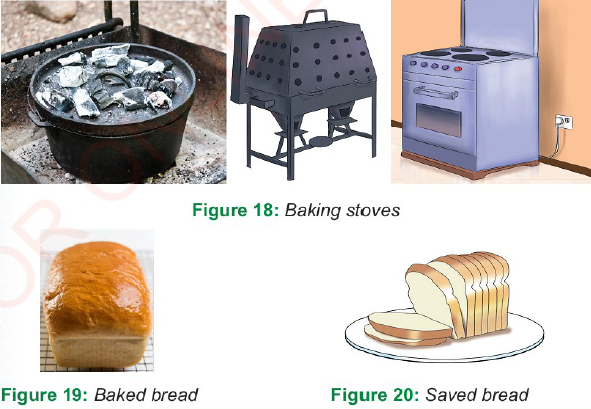
Baking: This method of cooking food uses prolonged dry heat, normally in an oven heated by charcoal, gas, or electricity. It can also be done in hot ash or on hot stones. Bread, biscuits and cakes are examples of foods cooked using this method. Heat is gradually transferred from the surface of baked food to the centre.
Advantages of cooking by baking
- The food can be preserved for a longer duration.
- It inhances the flavour of the food.
- Baked food is good for health because it contains a very little amount of fat or oil.
Disadvantages of cooking by baking
- The food may lose its shape if the cook is not careful.
- Dishes which require different temperatures cannot be baked at the same time.
- Baking takes a longer time to prepare food compared to the boiling method.
- It requires special skills which only a few people have.
Rules to follow in baking food
- Make sure all oven racks are placed well before switching on the oven.
- Preheat the oven or furnace before baking food.
- The amount of heat used in baking depends on the type of food to be baked. Some foods require high temperature in the beginning and medium or low temperature towards the end of the process. The upper part of the oven has high temperature so it has to be used when the food to be cooked requires high temperature.
- All the food that is baked together must be placed in the oven at the same time.
- Make sure that the amount of food to be baked fits in well with the size of the oven in order to avoid wastage of heat.
- Put enough food in the oven which will allow air and heat circulation for the food to be cooked evenly.
- Make sure the oven is closed throughout until the food is well cooked.
- After opening the oven door, close it immediately to avoid cool air
which may affect the texture and shape of the food. - Adhere to the required baking time for the individual food to prevent it from being burnt or uncooked.
Baking cakes
A cake is a snack which is liked by many people. Care should be taken when mixing the ingredients so as to meet the acceptable texture and taste. It is a snack which is a source of carbohydrates and proteins. It thus provides energy and proteins for body building.
Utensils
Baking pan, small basin or bowl, cup, table spoon, tea spoon, wooden spoon and food weighing scale
Ingredients
- 1 cup or 4 serving spoons orl kg of wheat flour
- 1 teaspoon of baking powder
- 2 table spoon of butter
- 2 table spoons of milk
- 2 eggs
- Vanilla or lemon
- 1 table spoon of sugar
Steps to be followed in baking cakes
- Prepare the baking tin and ingredients to be used.
- Preheat the oven or baking stove.
- Mix the flour with baking powder and sieve to remove dirt and to allow aeration.
- Cream butter and sugar together until creamy using a wooden spoon or a special machine.
- Whip the eggs in a cup and add in the mixture of butter and sugar. Gradually add a little amount of whipped egg while mixing until all egg is finished.
- Sprinkle little flour at a time. Fold into the mixture very lightly with a metal spoon until all the flour is mixed well.
- Add a little amount of milk or water in order to get a thick mixture. Add vanilla or lemon juice.
- Pour the mixture into a well-greased baking tin.
- Bake in a moderately hot oven for 15-30 minutes.
- Check whether the cake is ready by inserting a clean and safe skewer through the cake. If the skewer is covered with sticky substance, it means the cake is not ready.
- Return it to the oven for 5-10 more minutes based on the heat of the oven.
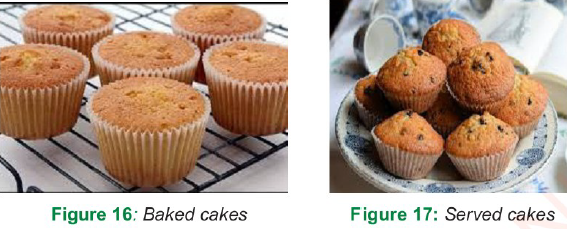
- When the cake is ready, remove it from the oven and place it on a cooling rack to allow it to cool as shown in Figure 16.
- Serve the cake on a clean and dry plate as shown in Figure 17.
 |
Baking bread
Bread is a type of food which may be eaten during breakfast or main meal. It provides the body with energy and heat. Care is needed when preparing and mixing ingredients for making the dough to ensure good quality in terms of shape, texture, and taste. The major ingredient for bread is wheat flour which may be mixed with cassava, maize or sorghum flour depending on the type of bread to be prepared.
Utensils
Baking pan, cup, mixing or large bowl, basin, wooden spoon, tea and a table spoon
Ingredients
- 1 kg of wheat flour (Choose the best wheat flour for bread making)
- 1 tea spoon of salt
- 1 teaspoon of yeast
- 1 table spoon of sugar
- 4 table spoons of cooking oil
Steps to be followed in baking bread
- Prepare the baking pan by applying little oil to the inside of it.
- Sieve the flour in order to remove large particles and dirt as well as to increase aeration.
- Mix yeast, sugar and cup of warm water in a large bowl.
- Add the mixture to the flour.
- Add salt and oil then mix well.
- Add water to the mixture to get thick dough and continue kneading it.
- Knead for about 10 minutes until it is smooth and uniform. Make sure the mixture does not stick on fingers or in the kneading bowl.
- Cover the dough and leave it for about 40 minutes to rise twice its original size.
- Prepare the charcoal or electric stove for baking.
- Knead the dough again for about 5 minutes.
- Cut the dough into small portions and prepare them based on the shape of the baking tin. Then, leave them for 15 minutes to allow them to rise.
- Bake the bread in moderate temperature for about 30 to 40 minutes.
- Start with low temperature for about 20 minutes then increase temperature to allow browning of the bread.
- When the bread is ready, remove it from the oven and place it on a cooling rack to allow it to cool as shown in Figure 19.
- Serve the bread as shown in Figure 20.
 |
Activity 6
Prepare one dish of your choice using the baking method.
Beverages
Beverages refer to all items which are consumed in liquid form such as tea, juice, and porridge. Water can also be included in this group as universal beverage. Beverages are important in our bodies for refreshment. They also give nutrients to the body. They also aid digestion and maintain body fluids.
Preparing milk tea
Milk tea is a common drink in Tanzania. It is an important drink because it refreshes, energizes and nourishes the body by providing nutrients like fat, calcium, and other minerals.
Rules for preparing milk tea
- Ensure the milk is boiled thoroughly to kill germs that can cause diseases. Serve the milk while hot.
- Utensils used to preserve milk should be washed with clean, warm water and soap.
Utensils
Tea strainer, teaspoon, sauce pan, jar or thermos, and cup
Ingredients
The following ingredients are needed to prepare
- 4 cups of tea:
- 1 teaspoon of tea leaves
- 2 cups of milk
- 2 cups of water
Steps to be followed in preparing milk tea
- Wash the jar or thermos flask by using clean, warm water.
- Boil the milk and put it into the clean jar, which maintains temperature for a long time.
- Boil the water in a clean pan.
- Put tea leaves in the jar.
- Put the boiled water in the jar with tea leaves and mix.
- Leave it for 3 minutes and strain the tea in a pot.
- Serve the tea, milk, and sugar as shown in Figure 21.
 Figure 21: Tea with milk |
Activity 7
Prepare and serve tea with milk attractively.
Preparing porridge
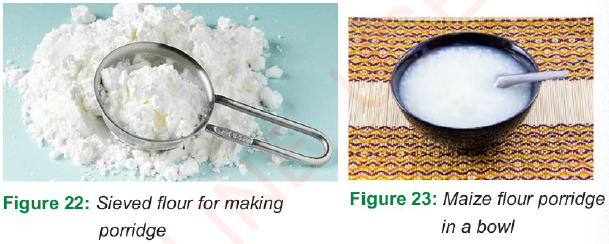
Porridge is a hot drink that is prepared by using flour made from different cereals such as maize, rice, sorghum, bulrush millet, cassava, finger millet, and wheat. Porridge is important to our bodies as it provides energy and heat. Porridge is a suitable drink for children, the elderly, and the sick.
Utensils
Sauce pan, cup, wooden spoon, sieve, bowl and spoon
Ingredients
3-4 cups of water
½ cup of cereal flour
½ cup of sugar
½ cup of milk
Steps to be followed in preparing porridge
- Sieve the flour to be used as shown in Figure 22.
- Boil the water in the saucepan.
- Stir a small amount of flour in cold water.
- Pour the mixture into the boiling water while stirring until the porridge starts boiling.
- Lower the cooking temperature and leave the porridge to boil for 10 to 30 minutes depending on the type of cereal used.
- Add boiled milk and sugar then stir properly to add taste, if desired.
- Remove the saucepan from the fire.
- Serve the prepared porridge for consumption as shown in Figure 23.
Note: Porridge can be served when hot or cold depending on the user.
 |
Activity 8
Prepare, cook, and serve porridge using any flour of your choice.
Preparing juice
Juice is a drink made from different fruits such as oranges, mangoes, and pineapples. Juice can also be made from baobab, tamarind or some plants such as carrots and sugar cane. Figure 24 is illustrative. Juice can be made from one fruit only or from a mixture of two or more fruits. The use of this drink refreshes our bodies and provides vitamins and minerals which help to protect our bodies.
Juice can be used immediately after preparation or can be stored to be used later. Different methods can be used to prepare juice. These include squeezing, mashing, blending, and soaking the ingredients. Examples of fruits that can be squeezed to get juice are oranges, lemons, and lime. Fruits such as avocado, pawpaw, and mango can be mashed or blended to get fruit juice.
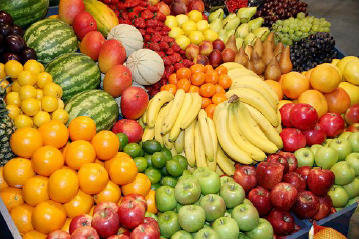 Figure 24: Assorted fruits for making juice |
Baobab or tamarind juice can be made by soaking the fruit in warm water for a few minutes before straining them for consumption.
Rules for preparing fruit juice
- Select fresh and well ripen fruits.
- Wash the fruits with clean and safe water, preferably running water.
- Make sure the utensils, hands, and place for making juice are clean and free from pathogens.
- Water for making juice should be boiled and allowed to cool before use.
- Prepared juice should be covered well and stored in a cool place or in the refrigerator.
Orange juice
Oranges are fruits that are grown in tropical areas. Oranges are important to human health as they provide vitamin C which helps to protect the body against diseases.
Utensils
Sharp knife, jug, table spoon, squeezer, small basin, juice strainer, sauce pan and cooker or stove
Ingredients
2 big oranges
2 glasses of boiled and cooled water 2 table spoons of sugar
Steps to be followed in preparing orange juice
- Boil water with sugar and leave it to cool to make syrup. The amount of sugar depends on individual preference.
- Wash the oranges properly with clean and safe water and peel them.
- Use a sharp knife to cut the oranges into 2 pieces.
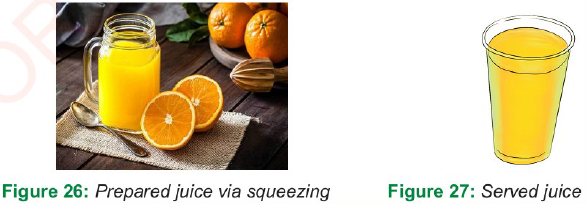
- Squeeze the oranges with a squeezer or by hand if you do not have a squeezer as shown in Figure 25.
- Strain the juice to remove the seeds and pour it into a clean jug.
- Add the syrup and stir properly.
- Pour the orange juice into a jar and store in a refrigerator or a cooling 0 as shown in Figure 26.
- Serve juice attractively as shown in Figure 27.
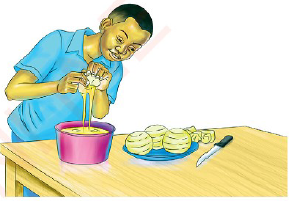 Figure 25: Preparing orange juice |
 |
Activity 9
Prepare any juice of your choice using the squeezing method.
| Exercise A. Choose the correct answer and write its letter. 1. Foods that can be cooked by shallow frying are______________
2. The following fruits can be used to prepare juice via squeezing:
3. The following are proper methods of cooking food by dry heat:
4. The following are rules for cooking food except______________
5. Which rule is adhered to when cooking food by frying?
6. It is not recommended to boil water with tea leaves because_________
B. Write TRUE for a true statement and FALSE for a false one. 1. It is recommended to frequently open the oven when baking to avoid for the food to be burnt.__________ 2. If the electric stove has exploded, do not attempt to splash it with water.__________ 3. The fruit for making juice should be well ripen and bitter.__________ 4. Grilling is a method of cooking food by using much oil.__________ 5. Eggs can be cooked by using little oil (partial frying).__________ 6. It is recommended to wash vegetables after cutting them into small pieces. ________________ |
C. Match the items in Column A with their counterparts in Column B to complete the meaning. | |
| Column A | Column B |
| 1.is the method of cooking using plenty of water. 2. Food taste decreases.3. is a cooking method that may change the shape of food. 4. is a type of food that is cooked without oil.5. Water to be used should be boiled and allowed to cool 6. The food takes a long time to be digested |
|
| D. Answer the following questions:
|
Vocabulary
Knead A process of mixing flour and water to prepare dough to be used in making food such as chapattis or bread
Utensils Tools which are found in the kitchen for domestic use
Ingredient Various foods used in preparing a certain dish or meal
Strainer A tool with small holes used for separating coarse from fine particles or A tool with small holes used for separating solid particles from a liquid
Shelf life The length of time that the food stays fresh before deteriorating
Recipe A list of instructions for preparing a particular dish: It contains a list of ingredients and methods
www.learninghubtz.co.tz

Hub App
 For Call,Sms&WhatsApp: 255769929722 / 255754805256
For Call,Sms&WhatsApp: 255769929722 / 255754805256  MATOKEO KIDATO CHA IV 2023
FORM ONE SELECTION 2024
Matokeo Darasa VII 2023
SECONDARY REGIONAL EXAMS
PRIMARY REGIONAL EXAMS
FORM VI NECTA REVIEWS
FORM IV NECTA REVIEWS
FORM II NECTA REVIEWS
STD VII NECTA REVIEWS
STD IV NECTA REVIEWS
SECONDARY EXAMS SERIES
PRIMARY EXAMS SERIES
PRIMARY SUBJECT NOTES
SECONDARY SUBJECT NOTES
SECONDARY TOPICAL EXAMS
SECONDARY TOPICAL QUESTIONS
PRIMARY TOPICAL QUESTIONS
PRACTICAL EXAMS & NOTES
SECONDARY REGIONAL EXAMS
DOWNLOAD SUBJECT NOTES
SCHEMES OF WORK (PRIMARY & SECONDARY)
LESSON PLAN
SECONDARY LOG BOOKS
PRIMARY LOG BOOKS
LITERARY WORKS / UCHAMBUZI VITABU
METHALI ZOTE ZA KISWAHILI
Vitendawili Vya Kiswahili
FORM VI RESULTS 2023
FORM FIVE SELECTION 2023
Matokeo KIDATO CHA II 2022
Matokeo Darasa IV 2022
MATOKEO KIDATO CHA IV 2023
FORM ONE SELECTION 2024
Matokeo Darasa VII 2023
SECONDARY REGIONAL EXAMS
PRIMARY REGIONAL EXAMS
FORM VI NECTA REVIEWS
FORM IV NECTA REVIEWS
FORM II NECTA REVIEWS
STD VII NECTA REVIEWS
STD IV NECTA REVIEWS
SECONDARY EXAMS SERIES
PRIMARY EXAMS SERIES
PRIMARY SUBJECT NOTES
SECONDARY SUBJECT NOTES
SECONDARY TOPICAL EXAMS
SECONDARY TOPICAL QUESTIONS
PRIMARY TOPICAL QUESTIONS
PRACTICAL EXAMS & NOTES
SECONDARY REGIONAL EXAMS
DOWNLOAD SUBJECT NOTES
SCHEMES OF WORK (PRIMARY & SECONDARY)
LESSON PLAN
SECONDARY LOG BOOKS
PRIMARY LOG BOOKS
LITERARY WORKS / UCHAMBUZI VITABU
METHALI ZOTE ZA KISWAHILI
Vitendawili Vya Kiswahili
FORM VI RESULTS 2023
FORM FIVE SELECTION 2023
Matokeo KIDATO CHA II 2022
Matokeo Darasa IV 2022
WHATSAPP US NOW FOR ANY QUERY
App Ya Learning Hub Tanzania